A custom domain name is the cornerstone of a professional online presence. Whether you’re a photographer showcasing your portfolio, a consultant promoting services, a blogger sharing your passion, or a small business owner selling products, a domain like “yourname.com” sets your Squarespace website apart from generic URLs like “mysite.squarespace.com.” A custom domain not only enhances credibility but also boosts your brand identity and search engine optimization (SEO), making it easier for clients and customers to find you.
Squarespace simplifies the process of connecting a domain, whether you purchase it directly through their platform or use one from a third-party registrar like GoDaddy, Namecheap, or Google Domains. This comprehensive guide will walk you through both methods, providing clear, beginner-friendly instructions to ensure your website is live with a professional domain. Tailored for Squarespace users, including photographers, consultants, bloggers, artists, freelancers, and e-commerce owners, this guide will help you connect your domain like a pro.
For additional tips on building your site, explore our guides on How to Create a Beautiful Website on Squarespace and How to Customize Any Squarespace Template Like a Pro.
Understanding Domain Connection
Before diving into the steps, let’s clarify what a domain is and the two main options for connecting one to your Squarespace website.
What is a Domain?
A domain name is the web address visitors use to access your site, such as www.example.com. It acts like a digital street address, directing users to the server hosting your website. In Squarespace’s case, your site is hosted on their servers, so connecting a domain involves pointing it to Squarespace’s infrastructure.
Types of Domains for Squarespace
You have two primary options for connecting a domain:
- Squarespace-Purchased Domains: These are domains bought directly through Squarespace. They integrate seamlessly with your site, and annual plans often include a free domain for the first year.
- Third-Party Domains: These are domains purchased from external registrars like GoDaddy, Namecheap, or Google Domains. Connecting these requires updating DNS settings, but Squarespace provides clear instructions to make it manageable.
Understanding these options will help you choose the best approach for your needs. Let’s explore how to connect each type.
Read More: Squarespace vs WordPress
Connecting a Squarespace-Purchased Domain
If you purchase your domain through Squarespace, the connection process is streamlined and automatic, making it ideal for beginners. Here’s how to do it:
Step-by-Step Guide
- Sign Up or Log In: If you’re new to Squarespace, start by signing up for a 14-day free trial at Squarespace.com. If you already have an account, log in to your dashboard.
- Choose a Plan: Select a Squarespace plan that suits your needs (e.g., Personal, Business, or Commerce). Most annual plans include a free domain for the first year.
- Select Your Domain: During sign-up or in the Domains section of your dashboard, search for an available domain name. Squarespace will suggest options based on your input (e.g., “janedoephotography.com” for a photographer).
- Complete the Purchase: Follow the prompts to purchase your domain. Once completed, Squarespace automatically connects the domain to your site.
- Customize Your Site: With your domain connected, use Squarespace’s drag-and-drop editor to build or refine your website. Learn more in our guide on Customizing Squarespace Templates.
- Set Your Site to Public: Go to Settings > Site Availability and toggle to “Public” to make your site accessible via your custom domain.
Benefits of Squarespace Domains
- Seamless Integration: No manual DNS configuration is required.
- Free First Year: Included with most annual plans, saving you money.
- SSL Included: Squarespace provides free SSL certificates for secure connections.
- Easy Management: Manage your domain and website in one dashboard.
For more details, refer to Squarespace’s official guide on Domains Basics.
You May Like: Add custom code in Squarespace
Connecting a Third-Party Domain
If you already own a domain from a registrar like GoDaddy, Namecheap, or Google Domains, or prefer to purchase one elsewhere, you can connect it to your Squarespace site by updating DNS settings. This process is slightly more technical but still accessible with Squarespace’s guidance.
Step-by-Step Guide
- Log into Squarespace:
- Access your Squarespace dashboard.
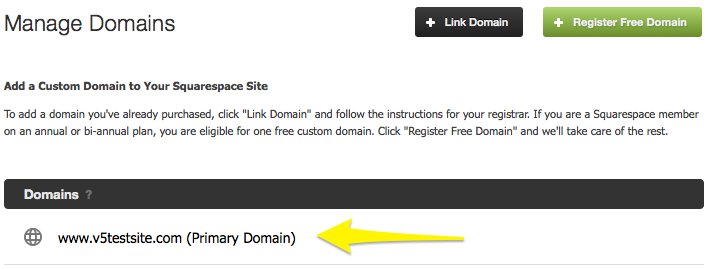
- Navigate to Settings > Domains.
- Add Your Domain:
- Click “Use a Domain I Own.”
- Enter your domain name (e.g., example.com) and click “Continue.”
- Obtain DNS Records:
- Squarespace will display the DNS records needed to connect your domain, such as:
- A Records: Point to Squarespace’s IP addresses (e.g., 198.185.159.144, 198.185.159.145, 198.49.23.144, 198.49.23.145).
- CNAME Record: Typically “www” pointing to “ext-cust.squarespace.com.”
- MX Records (optional): For email services, if applicable.
- TXT Records (optional): For domain verification or SPF settings.
- Keep this page open for reference.
- Squarespace will display the DNS records needed to connect your domain, such as:
- Access Your Registrar’s Control Panel:
- Log into your domain registrar’s website (e.g., GoDaddy, Namecheap, Google Domains).
- Find the DNS management section, often labeled “DNS,” “Nameservers,” or “Advanced Settings.”
- Update DNS Records:
- Add or modify the records provided by Squarespace. For example:
- A Record: @ -> 198.185.159.144 (repeat for all four IP addresses).
- CNAME: www -> ext-cust.squarespace.com.
- Replace any conflicting records, ensuring no old settings interfere.
- Add or modify the records provided by Squarespace. For example:
- Save Changes:
- Save your changes in the registrar’s control panel. Some registrars, like Namecheap, have a “Save All Changes” button.
- Wait for Propagation:
- DNS changes can take 24–48 hours to propagate globally, though it’s often faster. Use tools like WhatsMyDNS.net to check propagation status.
- Verify in Squarespace:
- Return to the Domains section in your Squarespace dashboard and click “Refresh” to check if the domain is connected.
- If successful, your domain will appear as connected, and your site will be accessible via the custom domain.
Learn More: Use categories and tags in the Squarespace blog
Example: Connecting a Namecheap Domain
Imagine you’re a blogger named Sarah Smith, and you’ve purchased “sarahsmithwrites.com” from Namecheap. Here’s how you’d connect it:
- In Squarespace:
- Go to Settings > Domains > Use a Domain I Own.
- Enter sarahsmithwrites.com.
- Note the DNS records, such as:
- A Record: @ -> 198.185.159.144 (and three others).
- CNAME: www -> ext-cust.squarespace.com.
- In Namecheap:
- Log into your Namecheap account.
- Go to Domain List > Manage > Advanced DNS.
- Add the A records and CNAME record as provided.
- Click “Save All Changes.”
- Verify:
- After a few hours, check if sarahsmithwrites.com loads your Squarespace site.
- Use a DNS checker to confirm propagation.
For a visual guide, see Namecheap’s Tutorial on Linking Domains to Squarespace.
Troubleshooting Common Issues
Even with clear instructions, you may encounter challenges. Here are common issues and solutions:
- Domain Not Connecting:
- Solution: Double-check DNS records for typos. Ensure all required records (A, CNAME, etc.) are added correctly. Wait for full propagation (up to 48 hours).
- Site Not Loading:
- Solution: Verify your site is set to “Public” in Settings > Site Availability. Clear your browser cache or try a different browser.
- Email Issues:
- Solution: If using the domain for email, ensure MX records are correctly configured. Squarespace provides guidance, but you may need to contact your email provider.
- Previous Connections:
- Solution: If the domain was linked to another site, disconnect it first. Check other Squarespace sites in your account to ensure the domain isn’t already in use.
For detailed troubleshooting, refer to Squarespace’s guide on Connecting a Third-Party Domain.
Choosing the Right Domain
Selecting a domain name is as important as connecting it. Here are tips to choose a domain that suits your brand:
- Keep It Relevant: Choose a name that reflects your business or personal brand (e.g., “fitwithjane.com” for a fitness coach).
- Make It Memorable: Short, catchy names are easier for visitors to remember and type.
- Use Keywords: Incorporate relevant keywords (e.g., “photography” for photographers) to boost SEO.
- Consider Extensions: Popular extensions like .com, .co, or .shop are widely recognized, but niche extensions like .photography or .art can add personality.
- Enable Domain Privacy: Protect your personal information by enabling WHOIS privacy, available through most registrars.
For inspiration, use Squarespace’s Business Name Generator.
Domain Management Tips
Once your domain is connected, follow these best practices to maintain it:
- Set Up Auto-Renewal: Prevent losing your domain by enabling automatic renewal with your registrar or Squarespace.
- Monitor Expiration: Keep track of your domain’s expiration date to avoid downtime.
- Transferring Domains: If you want to transfer a third-party domain to Squarespace, follow their transfer process, but be aware of potential downtime during the transfer.
- SSL Configuration: Squarespace automatically enables SSL for secure connections. Verify it’s active in Settings > Domains.
Comparison of Domain Connection Options
| Option | Ease of Use | Cost | Best For |
| Squarespace Domain | Very Easy | Free for 1st year (annual plans) | Beginners, seamless integration |
| Third-Party Domain | Moderate | Varies by registrar | Users with existing domains |
FAQ
1. Can I connect multiple domains to my Squarespace site?
Yes, Squarespace allows multiple domains to be connected to a single site. One domain is set as the primary, while others can redirect or be parked.
2. How long does it take for a domain to connect?
DNS changes typically take 24–48 hours to propagate globally, but it can be faster. Use tools like WhatsMyDNS.net to check progress.
3. Do I need to pay extra to connect a domain?
Squarespace domains are often free for the first year with annual plans. Third-party domains require payment to the registrar, but connecting them to Squarespace is free.
4. Can I use a subdomain with Squarespace?
Yes, subdomains (e.g., blog.yourdomain.com) can be connected using CNAME records. Check Squarespace’s Pointing a Subdomain guide for details.
Conclusion
Connecting a domain to your Squarespace website is a straightforward process that significantly enhances your online presence. Whether you choose a Squarespace-purchased domain for ease or a third-party domain for flexibility, this guide provides the steps to get your site live with a professional URL. By following these instructions and troubleshooting tips, you can ensure a smooth setup process, even if you’re new to website building.
Ready to launch your site? Start your 14-day free trial with Squarespace and use code “WBE10” for 10% off your first year. For personalized help with domain setup, SEO, or web design, contact Nurul Nahid for expert services tailored to your needs.