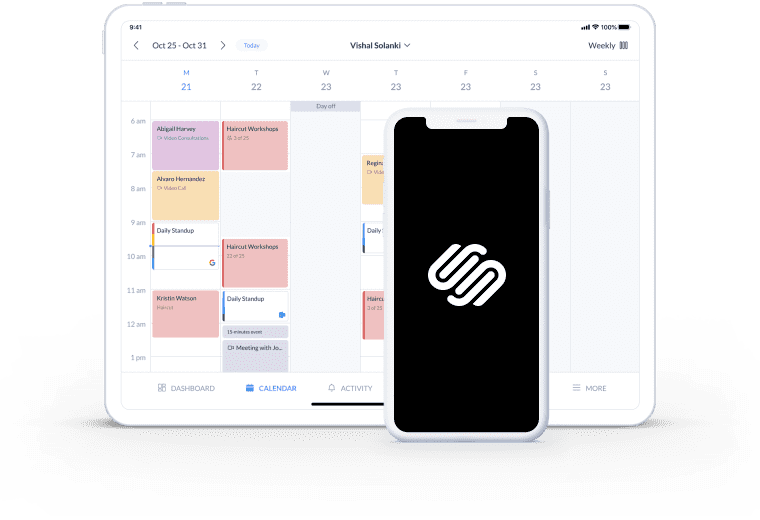
A booking system or calendar is a game-changer for service-based professionals and businesses using Squarespace, enabling clients to schedule appointments, classes, or events directly on your website. Whether you’re a photographer booking photo sessions, a coach scheduling consultations, a blogger offering workshops, or an event planner managing RSVPs, a seamless booking system enhances user experience, saves time, and boosts conversions. Squarespace offers robust solutions through its built-in Acuity Scheduling tool and integrations with third-party services like Elfsight Appointment Booking and Lodgify. This comprehensive guide, tailored for photographers, consultants, coaches, bloggers, artists, freelancers, event planners, real estate agents, therapists, musicians, small business owners, e-commerce store owners, interior designers, writers, nonprofits, makeup artists, wedding planners, fitness coaches, and virtual assistants, provides step-by-step instructions to add a booking system or calendar to your Squarespace site. From setup to optimization, you’ll learn how to create a professional, user-friendly booking experience. Ready to streamline your scheduling? Sign up for a 14-day free trial with Squarespace and use code “WBE10” for 10% off your first year.
Why Add a Booking System or Calendar?
A booking system or calendar on your Squarespace website offers numerous benefits, as highlighted by Squarespace’s guide on appointment-based businesses:
- Enhanced User Experience: Clients can book appointments directly, reducing friction and improving satisfaction.
- Time Efficiency: Automates scheduling, eliminating back-and-forth emails and minimizing errors.
- Professional Appearance: A dedicated booking page builds trust and credibility with your audience.
- Increased Conversions: Simplifies the booking process, encouraging more clients to schedule services.
- Analytics and Insights: Tracks booking performance, helping you optimize your offerings.
For example, a photographer can use a booking system to let clients schedule sessions, while a fitness coach can manage class registrations. These tools are particularly valuable for service-based professionals who rely on appointments to drive revenue.
Read More: Squarespace beginner’s guide
Choosing the Right Squarespace Plan
To add a booking system, you need a paid Squarespace plan, as some features are unavailable during the free trial. Squarespace’s 2025 pricing includes four plans: Basic ($16/month), Core ($23/month), Plus ($39/month), and Advanced ($99/month). Here’s how they relate to booking systems:
- Basic Plan: Supports Acuity Scheduling’s Scheduling block for basic appointment booking. Suitable for simple scheduling needs.
- Core Plan: Includes advanced customization options (e.g., custom CSS) for styling booking forms, ideal for personalized designs.
- Plus Plan: Offers e-commerce features, making it suitable for syncing booking data with payment systems.
- Advanced Plan: Includes advanced e-commerce tools like abandoned cart recovery, perfect for complex booking needs.
Recommendation: The Basic plan is sufficient for most users adding a booking system via Acuity Scheduling. For advanced customization or e-commerce integration, opt for the Core or Plus plan. For a detailed comparison, see Squarespace Plans Compared.
Plan Comparison for Booking Systems
| Plan | Price (Annual) | Booking Features | Best For |
| Basic | $16/month | Acuity Scheduling block | Simple appointment booking |
| Core | $23/month | Acuity block, custom CSS | Customized booking forms |
| Plus | $39/month | Acuity block, e-commerce integration | Booking with payments |
| Advanced | $99/month | All Plus features, advanced automation | Complex scheduling needs |
Methods for Adding a Booking System or Calendar
Squarespace supports multiple methods to add a booking system or calendar, catering to different needs and technical levels. Below are the primary approaches, based on insights from Squarespace’s Help Center and Elfsight’s guide.
Method 1: Using Acuity Scheduling (Built-In Tool)
Acuity Scheduling, Squarespace’s native booking tool, is the most seamless option for adding a booking system. It supports appointment scheduling, automated reminders, and calendar syncing.
Step-by-Step Guide
- Sign Up for Acuity Scheduling:
- Visit acuityscheduling.com and create a free account.
- Set up your scheduler by defining appointment types (e.g., “Photo Session,” “Consultation”), availability, and form fields (e.g., name, email).
- Connect Acuity to Squarespace:
- Log in to your Squarespace dashboard.
- Go to Settings > Connected Accounts.
- Find Acuity Scheduling and click Connect.
- Log in to your Acuity account and authorize the connection.
- Add a Scheduling Block:
- Navigate to the page where you want the booking calendar (e.g., “Book Now” page).
- Click Edit, then + Add Block.
- Select Scheduling from the block options.
- Choose the scheduler from your Acuity account (e.g., general scheduler or specific appointment type).
- Customize the Scheduling Block:
- Adjust the block’s appearance (e.g., colors, fonts) to match your site’s branding in Design > Site Styles.
- Set options like showing availability, appointment durations, or cancellation policies.
- Test the Booking System:
- Save and publish the page.
- Test by scheduling an appointment to ensure it appears in your Acuity calendar.
- Verify automated confirmations and reminders are sent correctly.
Why Use Acuity?
- Seamless Integration: Built into Squarespace, requiring no external code.
- Robust Features: Includes automated reminders, time zone detection, and payment integration with Stripe, Square, or PayPal.
- Scalability: Suitable for solo professionals or businesses with multiple staff.
Limitations:
- Cost: Advanced features require a paid Acuity plan (starting at $14/month).
- Customization: Limited design flexibility compared to third-party tools.
Method 2: Using Elfsight Appointment Booking
Elfsight Appointment Booking is a third-party widget offering high customization and additional features like SMS notifications and Google Calendar syncing.
Step-by-Step Guide
- Sign Up for Elfsight:
- Visit elfsight.com and create a free account.
- Select the Appointment Booking widget and customize it (e.g., add your logo, set appointment types, configure notifications).
- Get the Installation Code:
- After customizing, click Publish and copy the provided installation code.
- Add the Widget to Squarespace:
- Log in to your Squarespace dashboard.
- Go to the page where you want the booking form (e.g., homepage or “Services” page).
- Click Edit, then + Add Block.
- Select Code from the block options.
- Paste the Elfsight code into the Code block and ensure “Display Source” is unchecked.
- Save and Test:
- Save the page and preview it to ensure the widget displays correctly.
- Test the booking functionality by submitting a test appointment.
Why Use Elfsight?
- High Customization: Offers extensive design options to match your site’s aesthetic.
- Advanced Features: Includes SMS notifications, Google Calendar integration, and Zapier support.
- Free Plan: Suitable for small businesses with basic needs.
Limitations:
- Requires Code Block: Slightly more technical than Acuity’s built-in block.
- Cost: Premium features require a paid Elfsight plan (starting at $5/month).
Method 3: Using Lodgify for Vacation Rentals
Lodgify is a specialized booking system for vacation rentals, ideal for real estate agents or property managers.
Step-by-Step Guide
- Sign Up for Lodgify:
- Visit lodgify.com and create a free account.
- Set up your property details, availability, and pricing in Lodgify.
- Get the Booking Widget Code:
- In your Lodgify dashboard, go to Website > Booking Widget.
- Customize the widget (e.g., colors, layout) and copy the provided code.
- Add the Widget to Squarespace:
- Log in to your Squarespace dashboard.
- Add a Code block to your page (e.g., “Book Your Stay” page).
- Paste the Lodgify code into the Code block.
- Test the Integration:
- Save and publish the page.
- Test the booking process to ensure it syncs with your Lodgify account.
Why Use Lodgify?
- Specialized for Rentals: Tailored for vacation rentals, short-term stays, or event spaces.
- Channel Management: Integrates with platforms like Airbnb and Booking.com.
- Centralized Management: Handles reservations, rates, and policies in one dashboard.
Limitations:
- Niche Focus: Best for rental businesses, not general appointments.
- Cost: Requires a paid Lodgify plan (starting at $12/month).
Method 4: Using Other Third-Party Tools (e.g., Pembee)
Pembee offers AI-driven scheduling and client management, suitable for various professionals.
Step-by-Step Guide
- Sign Up for Pembee:
- Visit pembee.app and create an account.
- Configure your booking calendar and appointment types.
- Get the Installation Code:
- Copy the code provided by Pembee for embedding the booking calendar.
- Add to Squarespace:
- Use a Code block in Squarespace to paste the Pembee code.
- Save and publish the page.
- Test and Optimize:
- Test the booking system to ensure it works correctly.
- Adjust settings for optimal performance.
Why Use Pembee?
- AI-Driven Features: Offers smart scheduling and client management tools.
- User-Friendly: Designed for ease of use across industries.
Limitations:
- Cost: Requires a paid plan for full functionality.
- Learning Curve: May take time to explore advanced features.
Read More: How to backup Squarespace site
Best Practices for Your Booking System
To ensure your booking system is effective and user-friendly, follow these best practices, inspired by Pembee’s guide:
- Clear Instructions: Provide a brief description of the booking process (e.g., “Select a date and time, then confirm your appointment”).
- Mobile Optimization: Test your booking form on mobile devices to ensure responsiveness.
- Automated Notifications: Enable email or SMS confirmations and reminders to reduce no-shows.
- Calendar Syncing: Integrate with Google Calendar or other tools to avoid scheduling conflicts.
- Transparent Policies: Display cancellation and refund policies clearly to set expectations.
- SEO Optimization: Add keywords to your booking page’s meta title and description (e.g., “Book NYC Photography Sessions | Jane Doe”).
- Payment Integration: Use Stripe, Square, or PayPal for secure payments at booking.
Troubleshooting Common Issues
Here are solutions to common issues when adding a booking system:
- Booking Form Not Displaying:
- Cause: Incorrect code or block settings.
- Solution: Verify the Code block code or ensure the Scheduling block is linked to your Acuity account.
- Appointments Not Syncing:
- Cause: Integration issues or incorrect account connection.
- Solution: Check Settings > Connected Accounts for proper linking. Reconnect if necessary.
- Mobile Display Issues:
- Cause: Non-responsive widget or template settings.
- Solution: Adjust widget settings for mobile or switch to a mobile-friendly template like Brine.
- Payment Processing Errors:
- Cause: Misconfigured payment gateway.
- Solution: Verify Stripe, Square, or PayPal settings in Acuity or your booking tool.
For further assistance, contact Squarespace’s 24/7 support or visit the Squarespace Help Center.
Comparison of Booking System Methods
| Method | Ease of Use | Customization | Best For | Cost |
| Acuity Scheduling | Easy | Moderate | General appointments, beginners | Free (basic), paid for advanced |
| Elfsight Booking | Moderate | High | Customizable forms, advanced features | Free (basic), paid for premium |
| Lodgify | Moderate | High | Vacation rentals, hospitality | Paid |
| Pembee | Moderate | High | AI-driven scheduling, client management | Paid |
FAQ
Can I add a booking system to my Squarespace site without coding?
Yes, use Acuity Scheduling’s built-in Scheduling block or third-party widgets like Elfsight, which require only copying and pasting code into a Code block.
What Squarespace plan do I need for a booking system?
Any plan supports Acuity Scheduling’s basic features. For advanced customization or e-commerce integration, use a Core, Plus, Advanced, Business, or Commerce plan.
Can I accept payments through my booking system?
Yes, Acuity Scheduling and tools like Elfsight support payments via Stripe, Square, or PayPal, configurable during setup.
How do I ensure my booking system is mobile-friendly?
Test the booking form on mobile devices and adjust settings in your booking tool or Squarespace’s Design > Site Styles for responsiveness.
You May Like: Use categories and tags in the Squarespace blog
Conclusion
Adding a booking system or calendar to your Squarespace website is a powerful way to streamline scheduling, enhance user experience, and boost conversions. Whether you choose Acuity Scheduling for its seamless integration, Elfsight for customizable forms, Lodgify for vacation rentals, or Pembee for AI-driven features, this guide provides the tools to create a professional booking experience. By following best practices and troubleshooting tips, you can ensure your system is user-friendly and effective. Start implementing your booking system today with a 14-day free trial at Squarespace and use code “WBE10” for 10% off your first year. For expert help with setup, SEO, or design, contact Nurul Nahid.